I am glad your here
Create Your Own Stencil
Using zero-waste 3D floral cover die by Altenew
ALTENEW
kathi case
6/22/2025

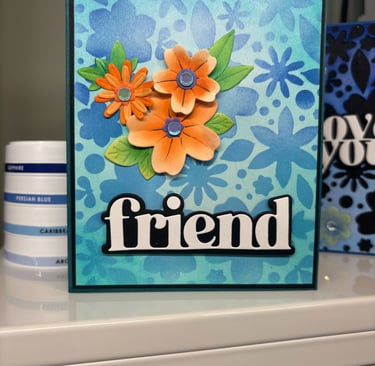
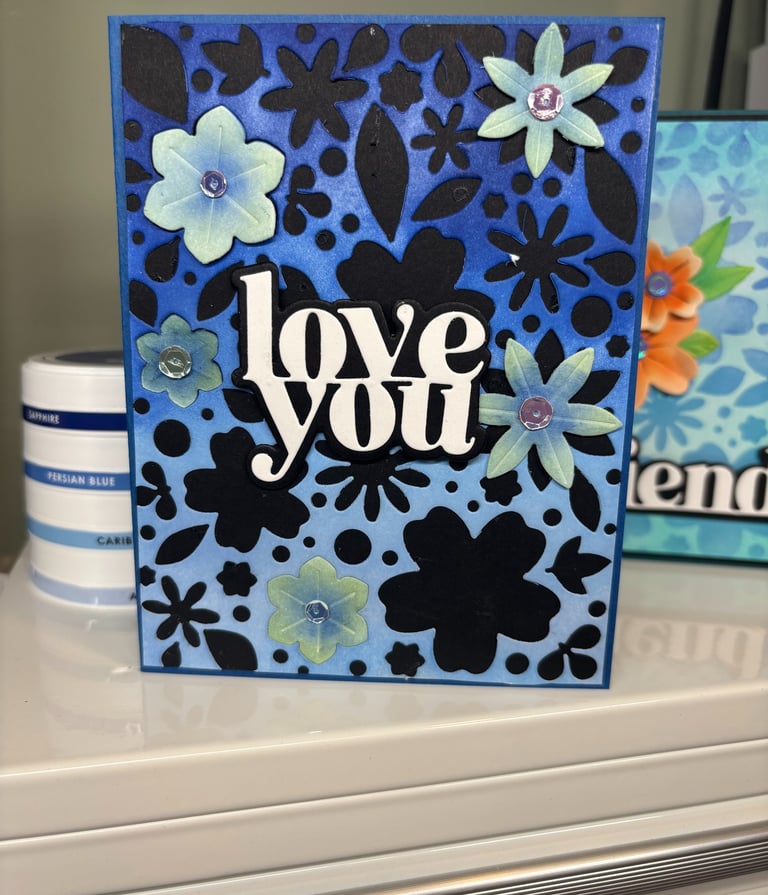
For both of these cards I used the Zero-Waste 3D Cover Die. This was an assignment for the Altenew Educator Certification Program. I have just started this program and already have learned alot.
This is how I made it:
I used a standard A2 card base 5.5 by 4.25. I used cardstock from my stash. I cut 2 panel using the Zero-waste die from white cardstock 110 lb.
Ink colors I used Arctic, Caribbean Sky, Persian blue and Sapphire by Altenew. I also used some yellow, orange and turquoise inks by other companies.
For the first and top card I used the negative space and ink blended with caribbean blue on a white card panel measuring 5 1/4 by 4. This created a design on that panel of all the die cut negative spaces. I then adhered it to a black panel that measures 5 3/8 by 4 1/8. I wasnt happy with all the white showing so I ink blended on top of the stenciled layer with a turquoise ink. I liked how that looked. I took some more of the die cut flowers and leaves ink blended and added to the front of this panel. I added a die cut sentiment and finished it off with some sequins.
I took the negative panel that i used as a stencil and ink blended starting from the top using sapphire ink then transitioned to persian blue to caribbean sky to arctic. This created an ombre look in the second card. I adhered it to black cardstock and added to a card base. I took some of the die cut flowers and leaves and ink blended and adhered to the card. To finish the top card I added a die cut sentiment and sequins.
What I learned from this class Celebration: Stencil Techniques was how to stretch my supplies. The instructor demos how to take a cover plate and use it in a totally different way than how it was created.
I love how these cards turned out! Thanks for stopping by my blog. If you see something you like in this post check out their website: ALTENEW
kathleen/group 57/Celebration: stencil techniques
#altenew
#altenewacademy